 Deutsche Version
Or: How to run the Intel Tualatin PIII / Celeron in a modern BX board.
Original: October 6 2002, English translation: March 2003 / Mathias Rufer
Overview:
The jumper settings are only valid for the MSI 6905 rev. 2.3 slotket.
Jumper settings of the slotket
The voltage settings are self explanatory printed on the box of the slotket. For voltages below of 1.50V please consult the Intel Celeron Datasheet and compare. For my CPU, I set the voltage jumpers to 1.50V.
JV4 2-3 (very important!!) Does the same as the blue
connection VID25m-VSS.
JV3: not connected
JV2: 2-3
JV1: not connected
JV0: not connected
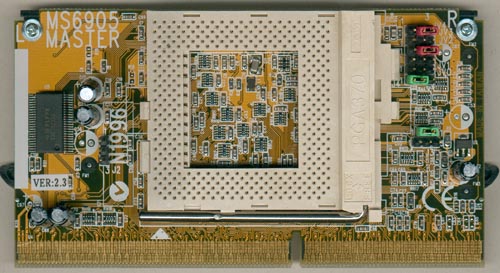
The remaining jumpers:
J1: short
J2: not connected (reserved)
J3: not connected
J4: 1-2
| Overview |
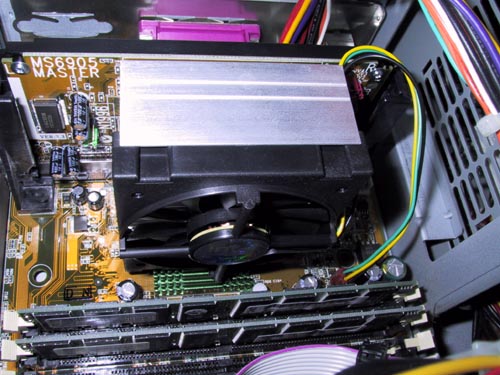
The original Intel cooler is quite big and has strong mounting clamps. When mounting, take care that the plastic cams of the slotket don't break-off! I removed the heat condicting pad and replaced it by a little bit head conductor paste. I strongly dissuade from removing the heat spreader.
To take precaution, I isolated the bottom side of the cooler (side pointing to the mainboard) with tape. This avoids short circuits if the huge cooler touched a component on the mainboard.
I don't think there is more explanation needed for the final assembly :-)
Hint: Update to the actual Beta BIOS 1008-004 before you exchange the CPU!!!
| Overview |
At the first boot attempt in jumperless mode you have to adjust FSB and multiplier manually: 100MHz*14.
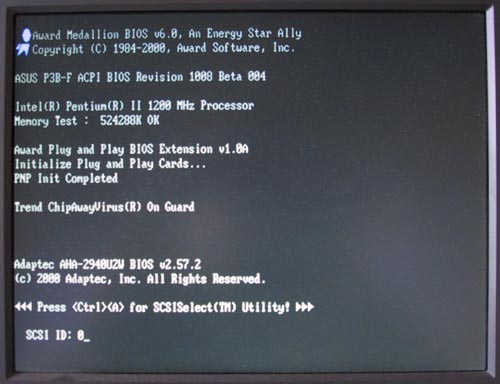 |
The CPU identification and frequency displayed by BIOS is incorrect... |
 |
...because the CPU really runs at 1400MHz. A quick check in Windows confirms that. |
| Overview |
| Page 2: the conversion | Contents |  |
Page 4: BIOS modification |